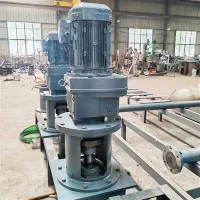
Hey there! As a scraper reducer supplier, I've seen my fair share of issues when it comes to these nifty machines. Debugging a scraper reducer when it runs into errors can be a real headache, but don't worry – I'm here to walk you through the process.
First off, let's talk about what a scraper reducer is. It's a crucial component in many industrial applications, like Mine Scraper Reducer, High-efficiency Thickener, and Sludge Scraper For Sewage Treatment. These reducers are responsible for adjusting the speed and torque of the scraper, ensuring smooth and efficient operation.
Step 1: Identify the Problem
The first step in debugging any issue is to figure out what's going wrong. This might seem obvious, but it's amazing how often people jump straight into trying to fix things without a clear understanding of the problem. Start by observing the scraper reducer in action. Is it making strange noises? Is it vibrating excessively? Is it not operating at the right speed? These are all clues that can help you pinpoint the problem.
For example, if you hear a grinding noise, it could be a sign of worn-out gears. Excessive vibration might indicate a misaligned motor or a loose belt. And if the speed is off, it could be due to a problem with the control system or a malfunctioning gearbox.
Step 2: Check the Power Supply
Once you've identified the problem, the next step is to check the power supply. A lot of issues with scraper reducers can be traced back to a faulty power source. Make sure the power cord is properly connected and that there are no signs of damage. Check the voltage and current levels to ensure they're within the recommended range.
If you're using a variable frequency drive (VFD) to control the speed of the scraper reducer, check the settings to make sure they're correct. Sometimes, a simple adjustment to the VFD settings can solve the problem.
Step 3: Inspect the Mechanical Components
After checking the power supply, it's time to take a closer look at the mechanical components of the scraper reducer. Start by inspecting the gears. Look for signs of wear, such as chipped or cracked teeth. If you notice any damage, the gears will need to be replaced.


Next, check the bearings. Worn-out bearings can cause excessive noise and vibration. You can use a stethoscope to listen for any abnormal noises coming from the bearings. If you suspect a problem, remove the bearings and inspect them for damage.
Also, check the belts and chains. Make sure they're properly tensioned and that there are no signs of wear or damage. A loose or worn-out belt or chain can cause the scraper reducer to operate inefficiently or not at all.
Step 4: Examine the Control System
The control system is another important component of the scraper reducer. It's responsible for regulating the speed and torque of the motor. If there's a problem with the control system, it can cause the scraper reducer to malfunction.
Start by checking the wiring connections. Make sure all the wires are properly connected and that there are no loose or frayed wires. Check the control panel for any error messages or warning lights. If you see an error message, refer to the manufacturer's manual for troubleshooting instructions.
If the control system uses a programmable logic controller (PLC), you may need to use a programming software to diagnose and fix the problem. This can be a bit more complicated, so if you're not familiar with PLC programming, it's best to consult a professional.
Step 5: Test the Scraper Reducer
Once you've made any necessary repairs or adjustments, it's time to test the scraper reducer. Start by running it at a low speed and gradually increase the speed to the normal operating level. Observe the scraper reducer closely to make sure it's operating smoothly and that there are no signs of problems.
If the problem persists, you may need to repeat the debugging process or consult a professional technician. Sometimes, the issue may be more complex than you initially thought, and it may require specialized tools or expertise to fix.
Conclusion
Debugging a scraper reducer when it encounters errors can be a challenging task, but by following these steps, you can increase your chances of success. Remember to always start by identifying the problem, checking the power supply, inspecting the mechanical components, examining the control system, and testing the scraper reducer.
If you're still having trouble debugging your scraper reducer, don't hesitate to reach out to us. As a scraper reducer supplier, we have the expertise and experience to help you solve any problem you may encounter. Whether you need a replacement part, a repair service, or just some advice, we're here to assist you.
So, if you're in the market for a new scraper reducer or need help with an existing one, contact us today to discuss your needs. We offer a wide range of high-quality scraper reducers for various applications, and we're committed to providing excellent customer service. Let's work together to ensure the smooth and efficient operation of your industrial equipment.
References
- Manufacturer's manuals for scraper reducers
- Industry standards and best practices for debugging industrial equipment
- Technical resources and forums for scraper reducer troubleshooting