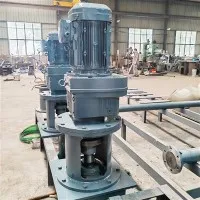
Hey there! As a supplier of Planetary Gear Reducers, I've seen firsthand how crucial it is to ensure proper coaxiality during installation. In this blog, I'll share some tips and tricks on how to achieve that, so your gear reducers can work at their best.
Why Coaxiality Matters
First off, let's talk about why coaxiality is such a big deal. When the input and output shafts of a planetary gear reducer aren't properly aligned, it can lead to a whole bunch of problems. For starters, it can cause uneven wear on the gears, which means they'll wear out faster and need to be replaced more often. This not only costs you money but also means more downtime for your equipment.
Misaligned shafts can also cause vibration and noise. That's not just annoying; it can actually damage other parts of your machinery over time. And if the vibration is bad enough, it can even affect the accuracy of your equipment, which is a huge problem in industries where precision is key.
Pre-Installation Checks
Before you even start installing your planetary gear reducer, there are a few things you need to do. First, make sure you've got the right reducer for the job. Check the specifications to ensure it can handle the torque, speed, and load requirements of your application. You don't want to end up with a reducer that's too small or too big for the task at hand.
Next, inspect the reducer and the mating components for any damage or defects. Look for things like cracks, dents, or scratches on the shafts, gears, and housing. If you find any issues, don't try to install the reducer; instead, contact your supplier to get a replacement.
You'll also want to clean all the mating surfaces thoroughly. Any dirt, debris, or grease can affect the alignment and cause problems down the road. Use a clean, lint-free cloth and a suitable cleaning solvent to remove any contaminants.
Alignment Tools
To ensure proper coaxiality, you'll need to use the right alignment tools. There are several types of tools available, each with its own advantages and disadvantages.
One of the most common tools is a dial indicator. This tool measures the amount of misalignment between the shafts by using a needle that moves along a scale. It's relatively easy to use and provides accurate results. However, it can be time-consuming to set up and requires some skill to use properly.
Another option is a laser alignment tool. These tools use lasers to measure the alignment of the shafts. They're faster and more accurate than dial indicators, and they can also measure both angular and parallel misalignment. However, they're more expensive and require a bit more training to use.


Installation Steps
Once you've done your pre-installation checks and gathered your alignment tools, it's time to start installing the reducer. Here's a step-by-step guide on how to do it:
- Mount the Reducer: Start by mounting the reducer to the base or frame using the appropriate bolts and nuts. Make sure the mounting surface is flat and level, and tighten the bolts to the recommended torque specifications.
- Align the Input Shaft: Use your alignment tool to align the input shaft of the reducer with the output shaft of the motor. This is usually the most critical alignment, as any misalignment here can cause significant problems. Adjust the position of the reducer until the alignment is within the acceptable tolerance.
- Align the Output Shaft: Next, align the output shaft of the reducer with the input shaft of the driven equipment. Again, use your alignment tool to ensure the alignment is correct. This step is just as important as aligning the input shaft, as it affects the performance of the entire system.
- Check the Alignment Again: After you've tightened all the bolts and made your initial adjustments, check the alignment again to make sure it hasn't changed. Sometimes, tightening the bolts can cause a small amount of movement, so it's important to double-check.
- Secure the Reducer: Once you're satisfied with the alignment, secure the reducer in place by tightening all the bolts and nuts to the recommended torque specifications. Make sure everything is tight and secure to prevent any movement during operation.
Post-Installation Testing
After you've installed the reducer, it's important to test it to make sure it's working properly. Start by running the equipment at a low speed and checking for any vibration, noise, or other signs of misalignment. If you notice any issues, stop the equipment immediately and recheck the alignment.
Once you're satisfied that the reducer is working properly, you can gradually increase the speed and load to the normal operating conditions. Monitor the equipment closely during this process to make sure everything is running smoothly.
Additional Tips
Here are a few additional tips to help you ensure the coaxiality of your planetary gear reducer during installation:
- Follow the Manufacturer's Instructions: Always follow the manufacturer's instructions when installing the reducer. They'll provide you with the specific alignment tolerances, torque specifications, and installation procedures for your particular model.
- Use a Torque Wrench: When tightening the bolts and nuts, use a torque wrench to ensure you're applying the correct amount of torque. Over-tightening can cause damage to the components, while under-tightening can lead to movement and misalignment.
- Keep the Work Area Clean: Make sure the work area is clean and free of debris. This will help prevent any contaminants from getting into the reducer and causing problems.
- Train Your Employees: If you have employees who will be installing or maintaining the reducers, make sure they're properly trained. This will help ensure that the installations are done correctly and that any issues are detected and addressed promptly.
Conclusion
Ensuring the coaxiality of a planetary gear reducer during installation is crucial for its performance and longevity. By following the steps outlined in this blog and using the right tools and techniques, you can ensure that your reducers are installed correctly and working at their best.
If you're in the market for a planetary gear reducer, or if you have any questions about installation or alignment, feel free to contact us. We're here to help you find the right solution for your needs. And don't forget to check out our other gear reducers, like the Hardened Gear Reducer, NMRV Gear Reducer, and Helical Gear Parallel Shaft Reducer.
References
- Machinery's Handbook, 31st Edition
- Alignment Handbook for Rotating Equipment
- Planetary Gear Reducer Installation and Maintenance Manual