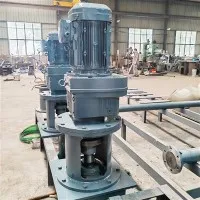
As a trusted supplier of reactor agitators, ensuring the proper alignment of these crucial components during installation is of utmost importance. Misalignment can lead to a host of problems, including reduced efficiency, increased wear and tear, and even premature failure of the agitator and other associated equipment. In this blog post, we will delve into the key steps and best practices for ensuring the alignment of a reactor agitator during installation, drawing on our extensive experience and expertise in the field.
Understanding the Importance of Alignment
Before we dive into the installation process, it's essential to understand why alignment is so critical for reactor agitators. A properly aligned agitator ensures that the impeller rotates smoothly and evenly within the reactor, creating a uniform flow pattern and maximizing mixing efficiency. This not only improves the quality and consistency of the product being processed but also reduces energy consumption and extends the lifespan of the agitator and other components.
On the other hand, misalignment can cause a variety of issues, such as vibration, noise, and excessive stress on the shaft and bearings. These problems can lead to premature wear and tear, increased maintenance costs, and even catastrophic failure of the agitator, which can result in costly downtime and production losses. Therefore, taking the time to ensure proper alignment during installation is a small investment that can pay off significantly in the long run.
Pre-Installation Preparation
The first step in ensuring the alignment of a reactor agitator is to conduct a thorough pre-installation inspection and preparation. This includes reviewing the installation drawings and specifications, checking the condition of the equipment and components, and ensuring that all necessary tools and materials are available. Here are some key points to consider:
-
Review the Installation Drawings and Specifications: Carefully review the installation drawings and specifications provided by the manufacturer to ensure that you understand the requirements and procedures for installing the agitator. Pay close attention to the dimensions, tolerances, and alignment requirements, as well as any special instructions or precautions.
-
Check the Condition of the Equipment and Components: Inspect the agitator, motor, gearbox, and other components for any signs of damage or wear. Check the shaft for straightness and alignment, and ensure that the impeller is properly balanced. If any issues are found, address them before proceeding with the installation.
-
Prepare the Installation Site: Clear the installation site of any debris, tools, or other obstacles. Make sure the floor or foundation is level and capable of supporting the weight of the agitator and associated equipment. If necessary, install a mounting plate or base to provide a stable foundation for the agitator.
-
Gather the Necessary Tools and Materials: Collect all the tools and materials required for the installation, including wrenches, sockets, torque wrenches, shims, alignment tools, and safety equipment. Make sure the tools are in good condition and properly calibrated.
Installation Procedures
Once the pre-installation preparation is complete, it's time to start the installation process. The following steps outline the general procedure for installing and aligning a reactor agitator:
-
Mount the Agitator: Carefully lift the agitator and place it on the mounting plate or base. Use the appropriate bolts and nuts to secure the agitator to the mounting surface, following the manufacturer's specifications for torque values. Make sure the agitator is level and centered on the mounting surface.
-
Install the Motor and Gearbox: Mount the motor and gearbox to the agitator, following the manufacturer's instructions. Connect the motor to the gearbox using the appropriate coupling, and make sure the coupling is properly aligned. Check the alignment of the motor and gearbox shafts using a dial indicator or other alignment tool.
-
Connect the Shaft and Impeller: Install the shaft and impeller onto the agitator, following the manufacturer's specifications. Make sure the shaft is properly aligned with the motor and gearbox shafts, and that the impeller is securely attached to the shaft. Check the alignment of the shaft and impeller using a dial indicator or other alignment tool.
-
Check the Alignment: Use a dial indicator or other alignment tool to check the alignment of the agitator shaft with the motor and gearbox shafts. Make sure the alignment is within the manufacturer's specified tolerances. If necessary, use shims or other adjustment methods to correct the alignment.
-
Verify the Alignment: Once the alignment is adjusted, verify the alignment using a second alignment tool or method. This helps to ensure the accuracy and reliability of the alignment.


-
Secure the Alignment: Once the alignment is verified, secure the alignment by tightening the bolts and nuts on the mounting plate, motor, gearbox, and other components. Make sure the bolts are tightened to the manufacturer's specified torque values.
Alignment Techniques
There are several techniques and tools available for aligning a reactor agitator during installation. The choice of technique and tool depends on the type of agitator, the installation requirements, and the available resources. Here are some common alignment techniques and tools:
-
Dial Indicator: A dial indicator is a precision measuring tool that can be used to measure the alignment of the agitator shaft with the motor and gearbox shafts. The dial indicator is typically mounted on a magnetic base and placed in contact with the shaft. As the shaft rotates, the dial indicator measures the amount of movement or displacement, which can be used to determine the alignment.
-
Laser Alignment Tool: A laser alignment tool uses a laser beam to measure the alignment of the agitator shaft with the motor and gearbox shafts. The laser alignment tool is typically more accurate and precise than a dial indicator, and it can measure the alignment in multiple planes simultaneously.
-
Shims: Shims are thin pieces of metal or plastic that can be used to adjust the alignment of the agitator shaft. Shims are typically placed between the agitator and the mounting plate or base to raise or lower the agitator and correct the alignment.
-
Alignment Software: Alignment software can be used to analyze the alignment data collected by a dial indicator or laser alignment tool. The software can provide detailed reports and recommendations for correcting the alignment, as well as simulate the effects of different adjustment methods.
Post-Installation Checks and Maintenance
Once the reactor agitator is installed and aligned, it's important to conduct a series of post-installation checks and maintenance to ensure the continued performance and reliability of the equipment. Here are some key points to consider:
-
Check the Alignment: After the agitator has been running for a few hours, check the alignment again to ensure that it has not shifted or changed. If necessary, make any adjustments to the alignment.
-
Inspect the Equipment: Inspect the agitator, motor, gearbox, and other components for any signs of wear, damage, or leakage. Check the lubrication levels and condition of the bearings, and make sure the seals are properly installed and functioning.
-
Perform Regular Maintenance: Follow the manufacturer's recommended maintenance schedule for the agitator and associated equipment. This includes regular inspections, lubrication, and replacement of worn or damaged components.
-
Monitor the Performance: Monitor the performance of the agitator, including the speed, torque, power consumption, and vibration levels. Any significant changes in these parameters may indicate a problem with the alignment or other components of the equipment.
Conclusion
Ensuring the alignment of a reactor agitator during installation is a critical step in ensuring the performance and reliability of the equipment. By following the steps and best practices outlined in this blog post, you can minimize the risk of misalignment and ensure that your agitator operates smoothly and efficiently for years to come.
As a leading supplier of reactor agitators, we offer a wide range of Turbine Agitator, Side-entry Stirring Device, and Dissolving Kettle Agitator to meet the needs of various industries and applications. Our experienced team of engineers and technicians can provide expert advice and support on the installation, alignment, and maintenance of our agitators.
If you are interested in learning more about our reactor agitators or need assistance with the installation and alignment of your equipment, please feel free to contact us. We look forward to working with you to ensure the success of your project.
References
- Manufacturer's installation and maintenance manuals for reactor agitators.
- Industry standards and best practices for equipment alignment and installation.
- Technical literature and research papers on the design and operation of reactor agitators.